Email

Instagram

Facebook

Pages

Tuesday, December 26, 2017

You Rock!

Happy Holidays everyone! I hope you all had a blessed Christmas!
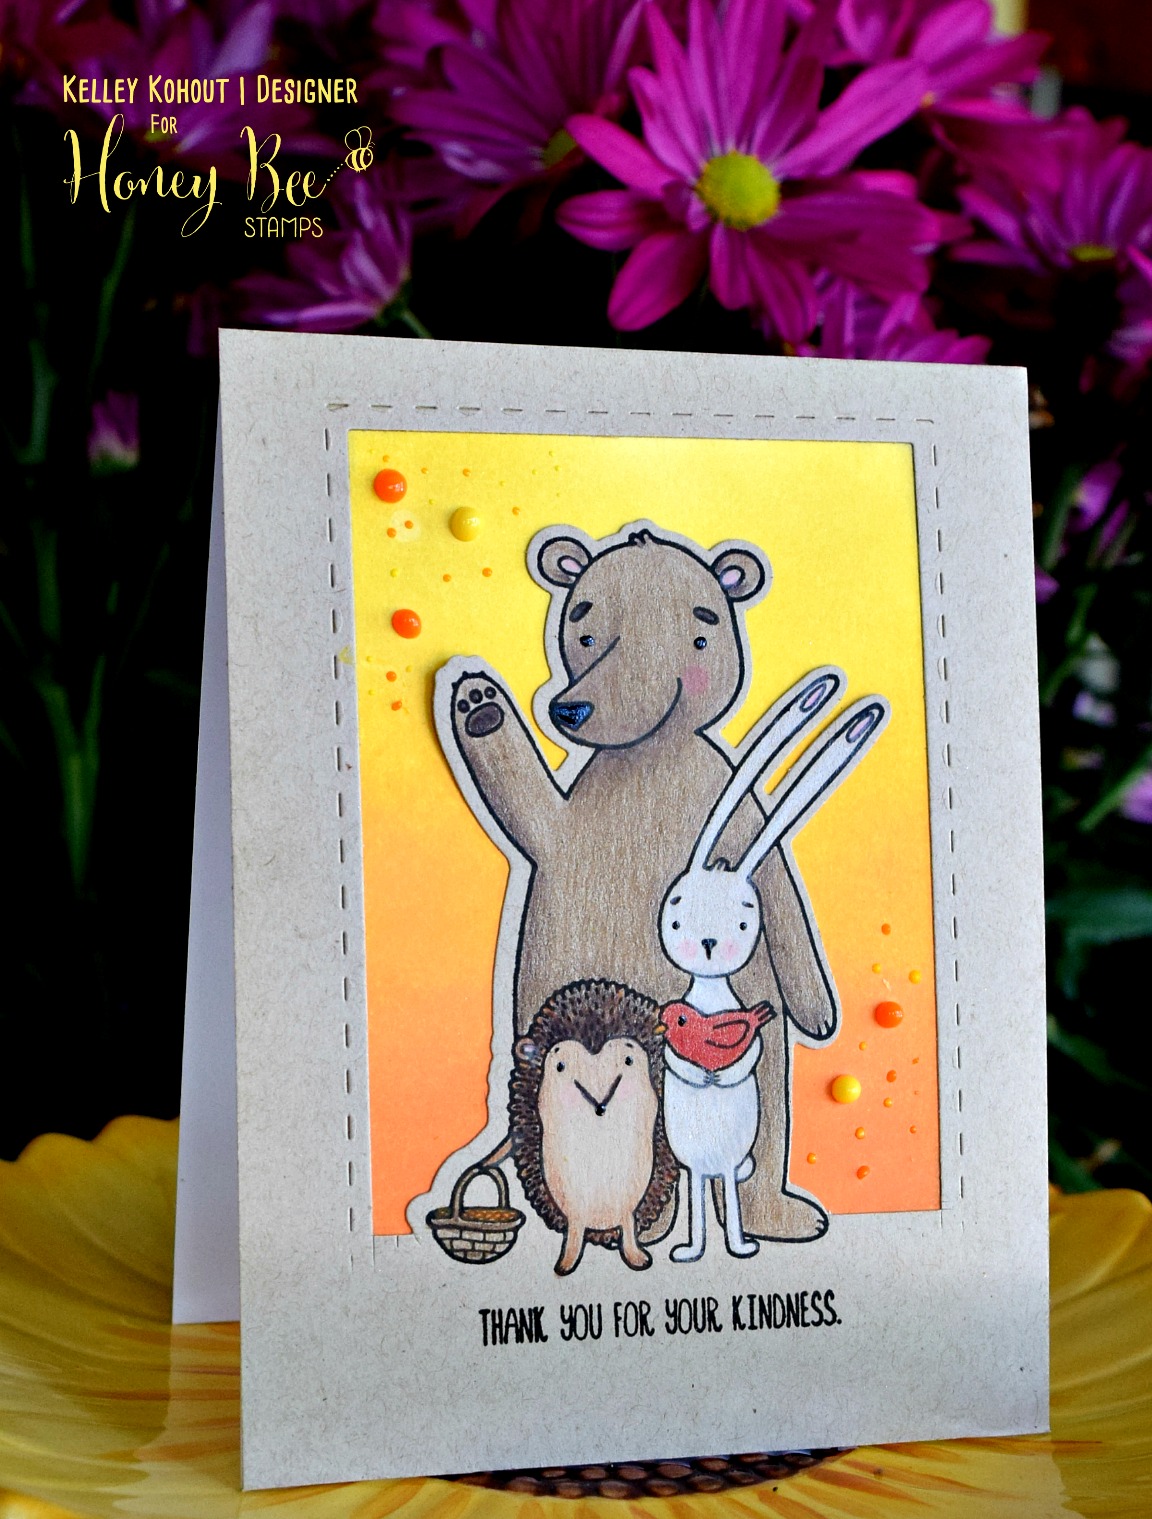
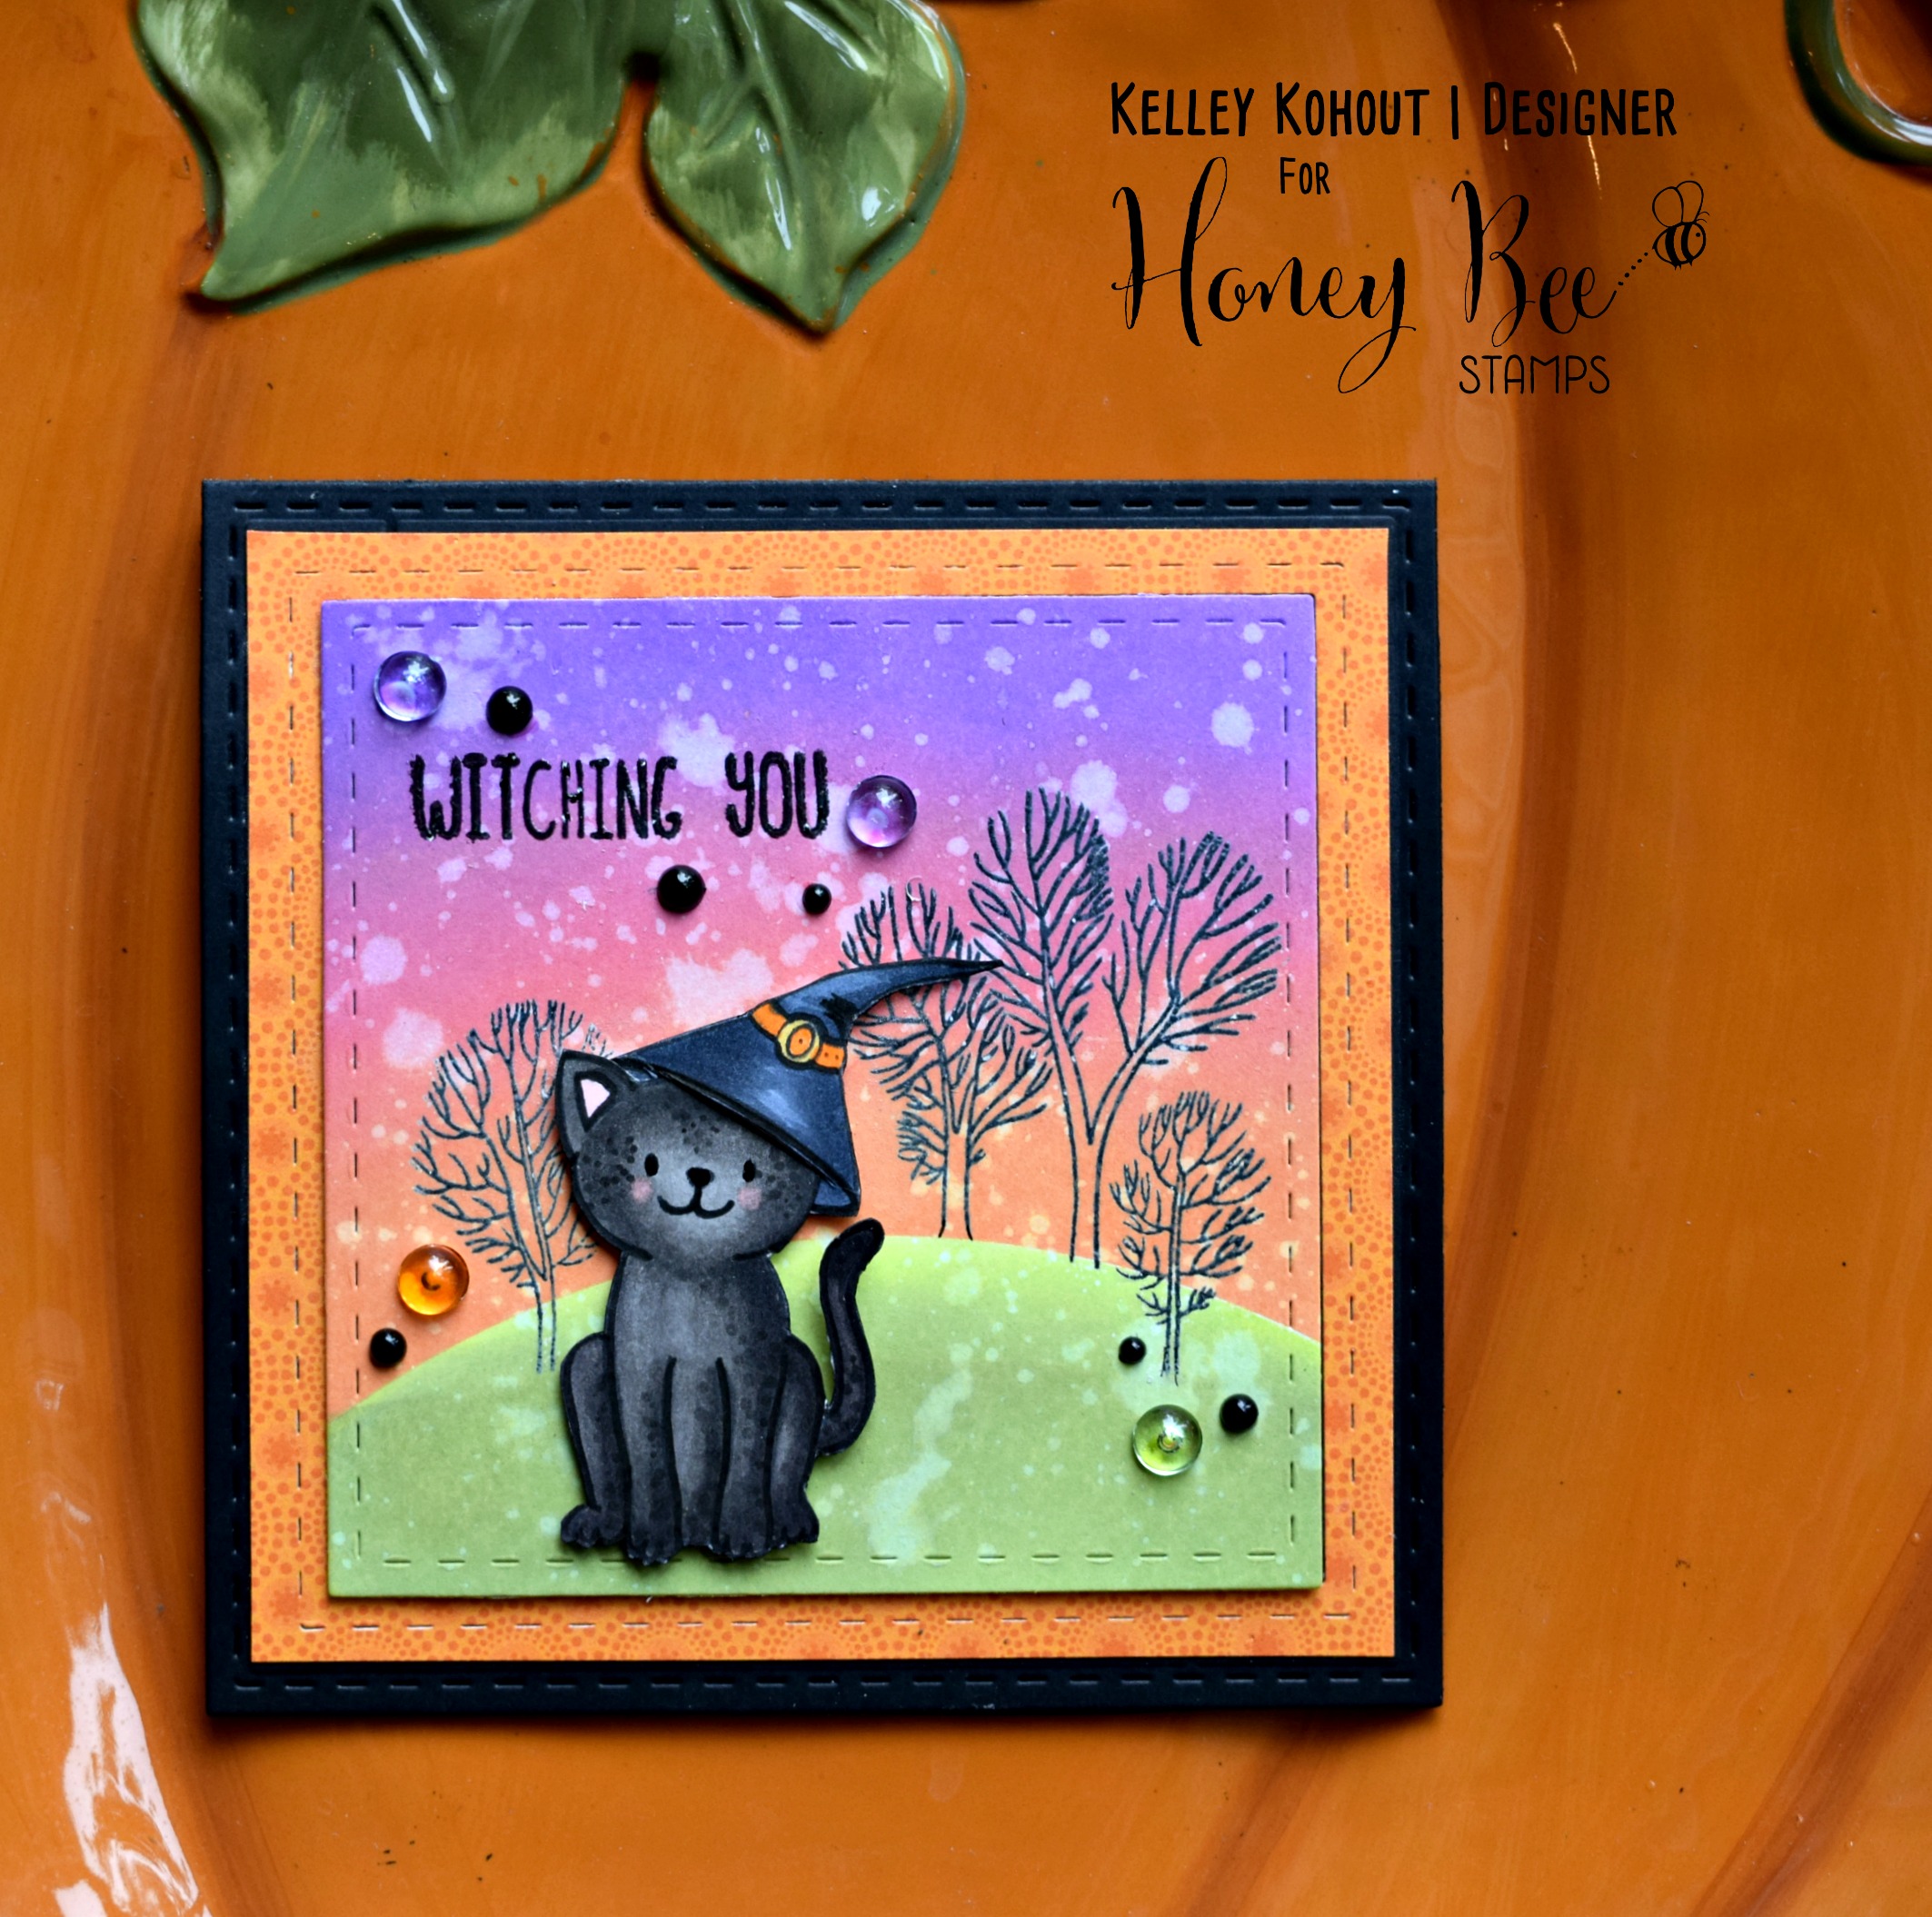
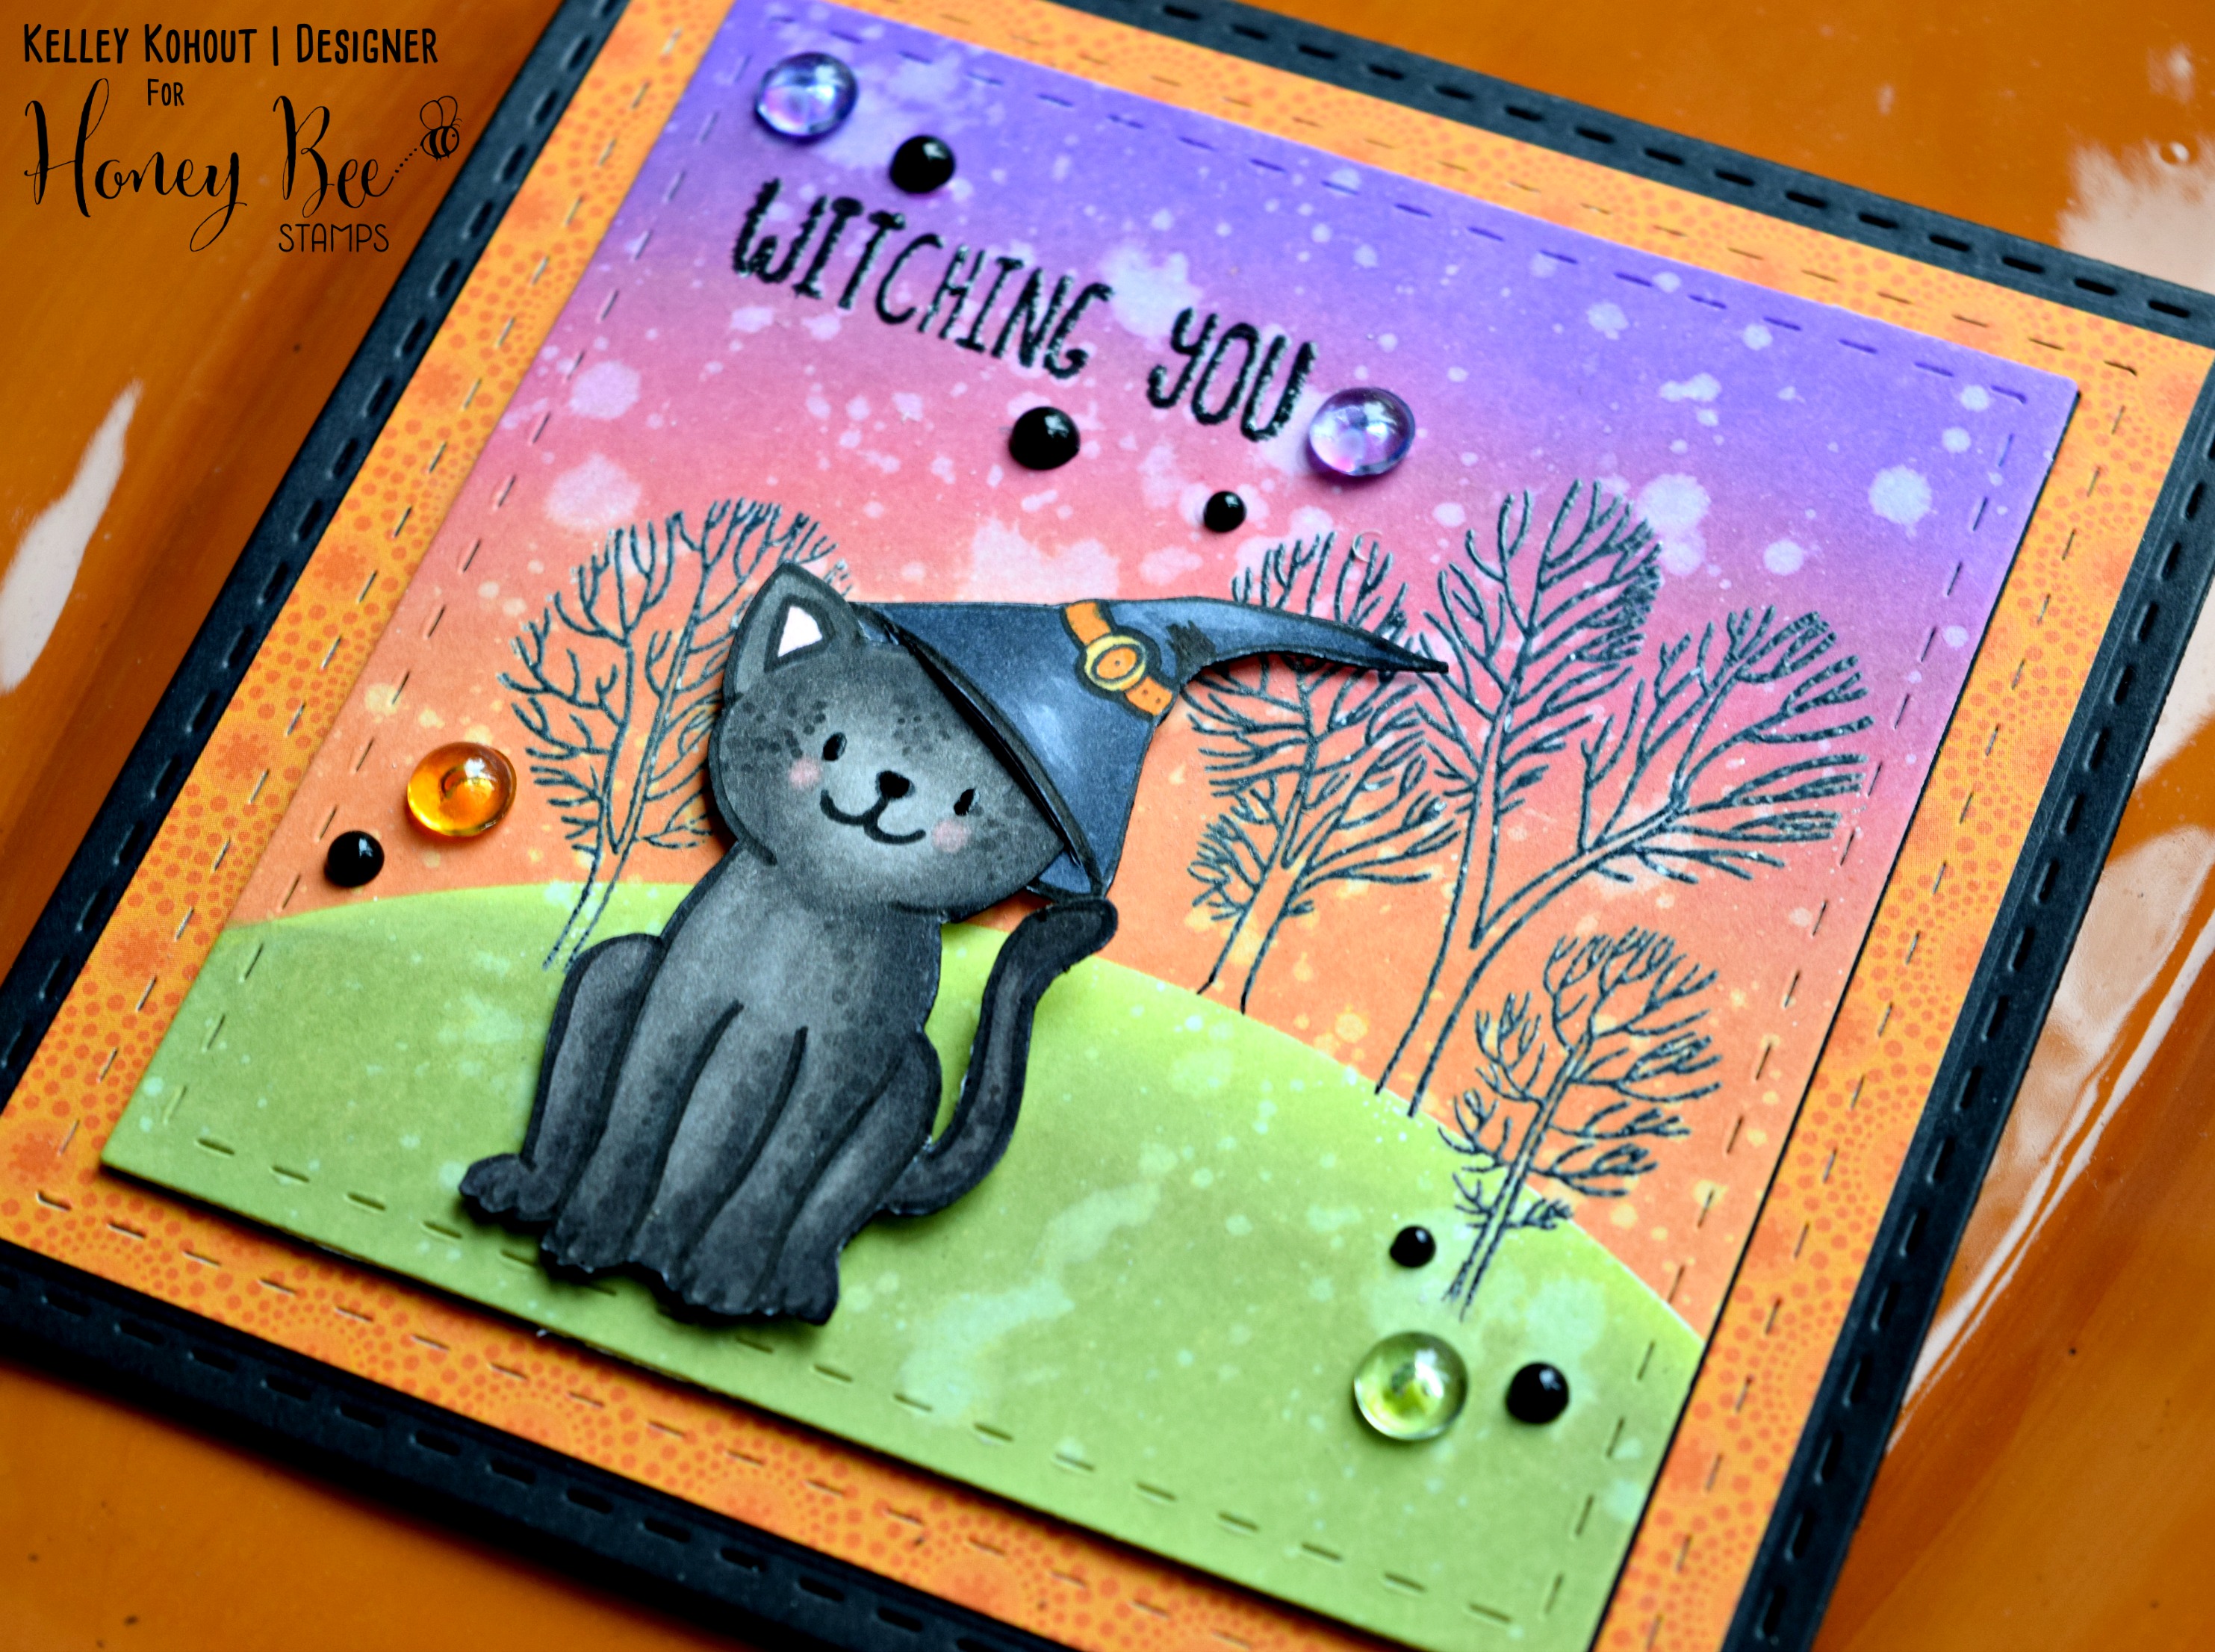
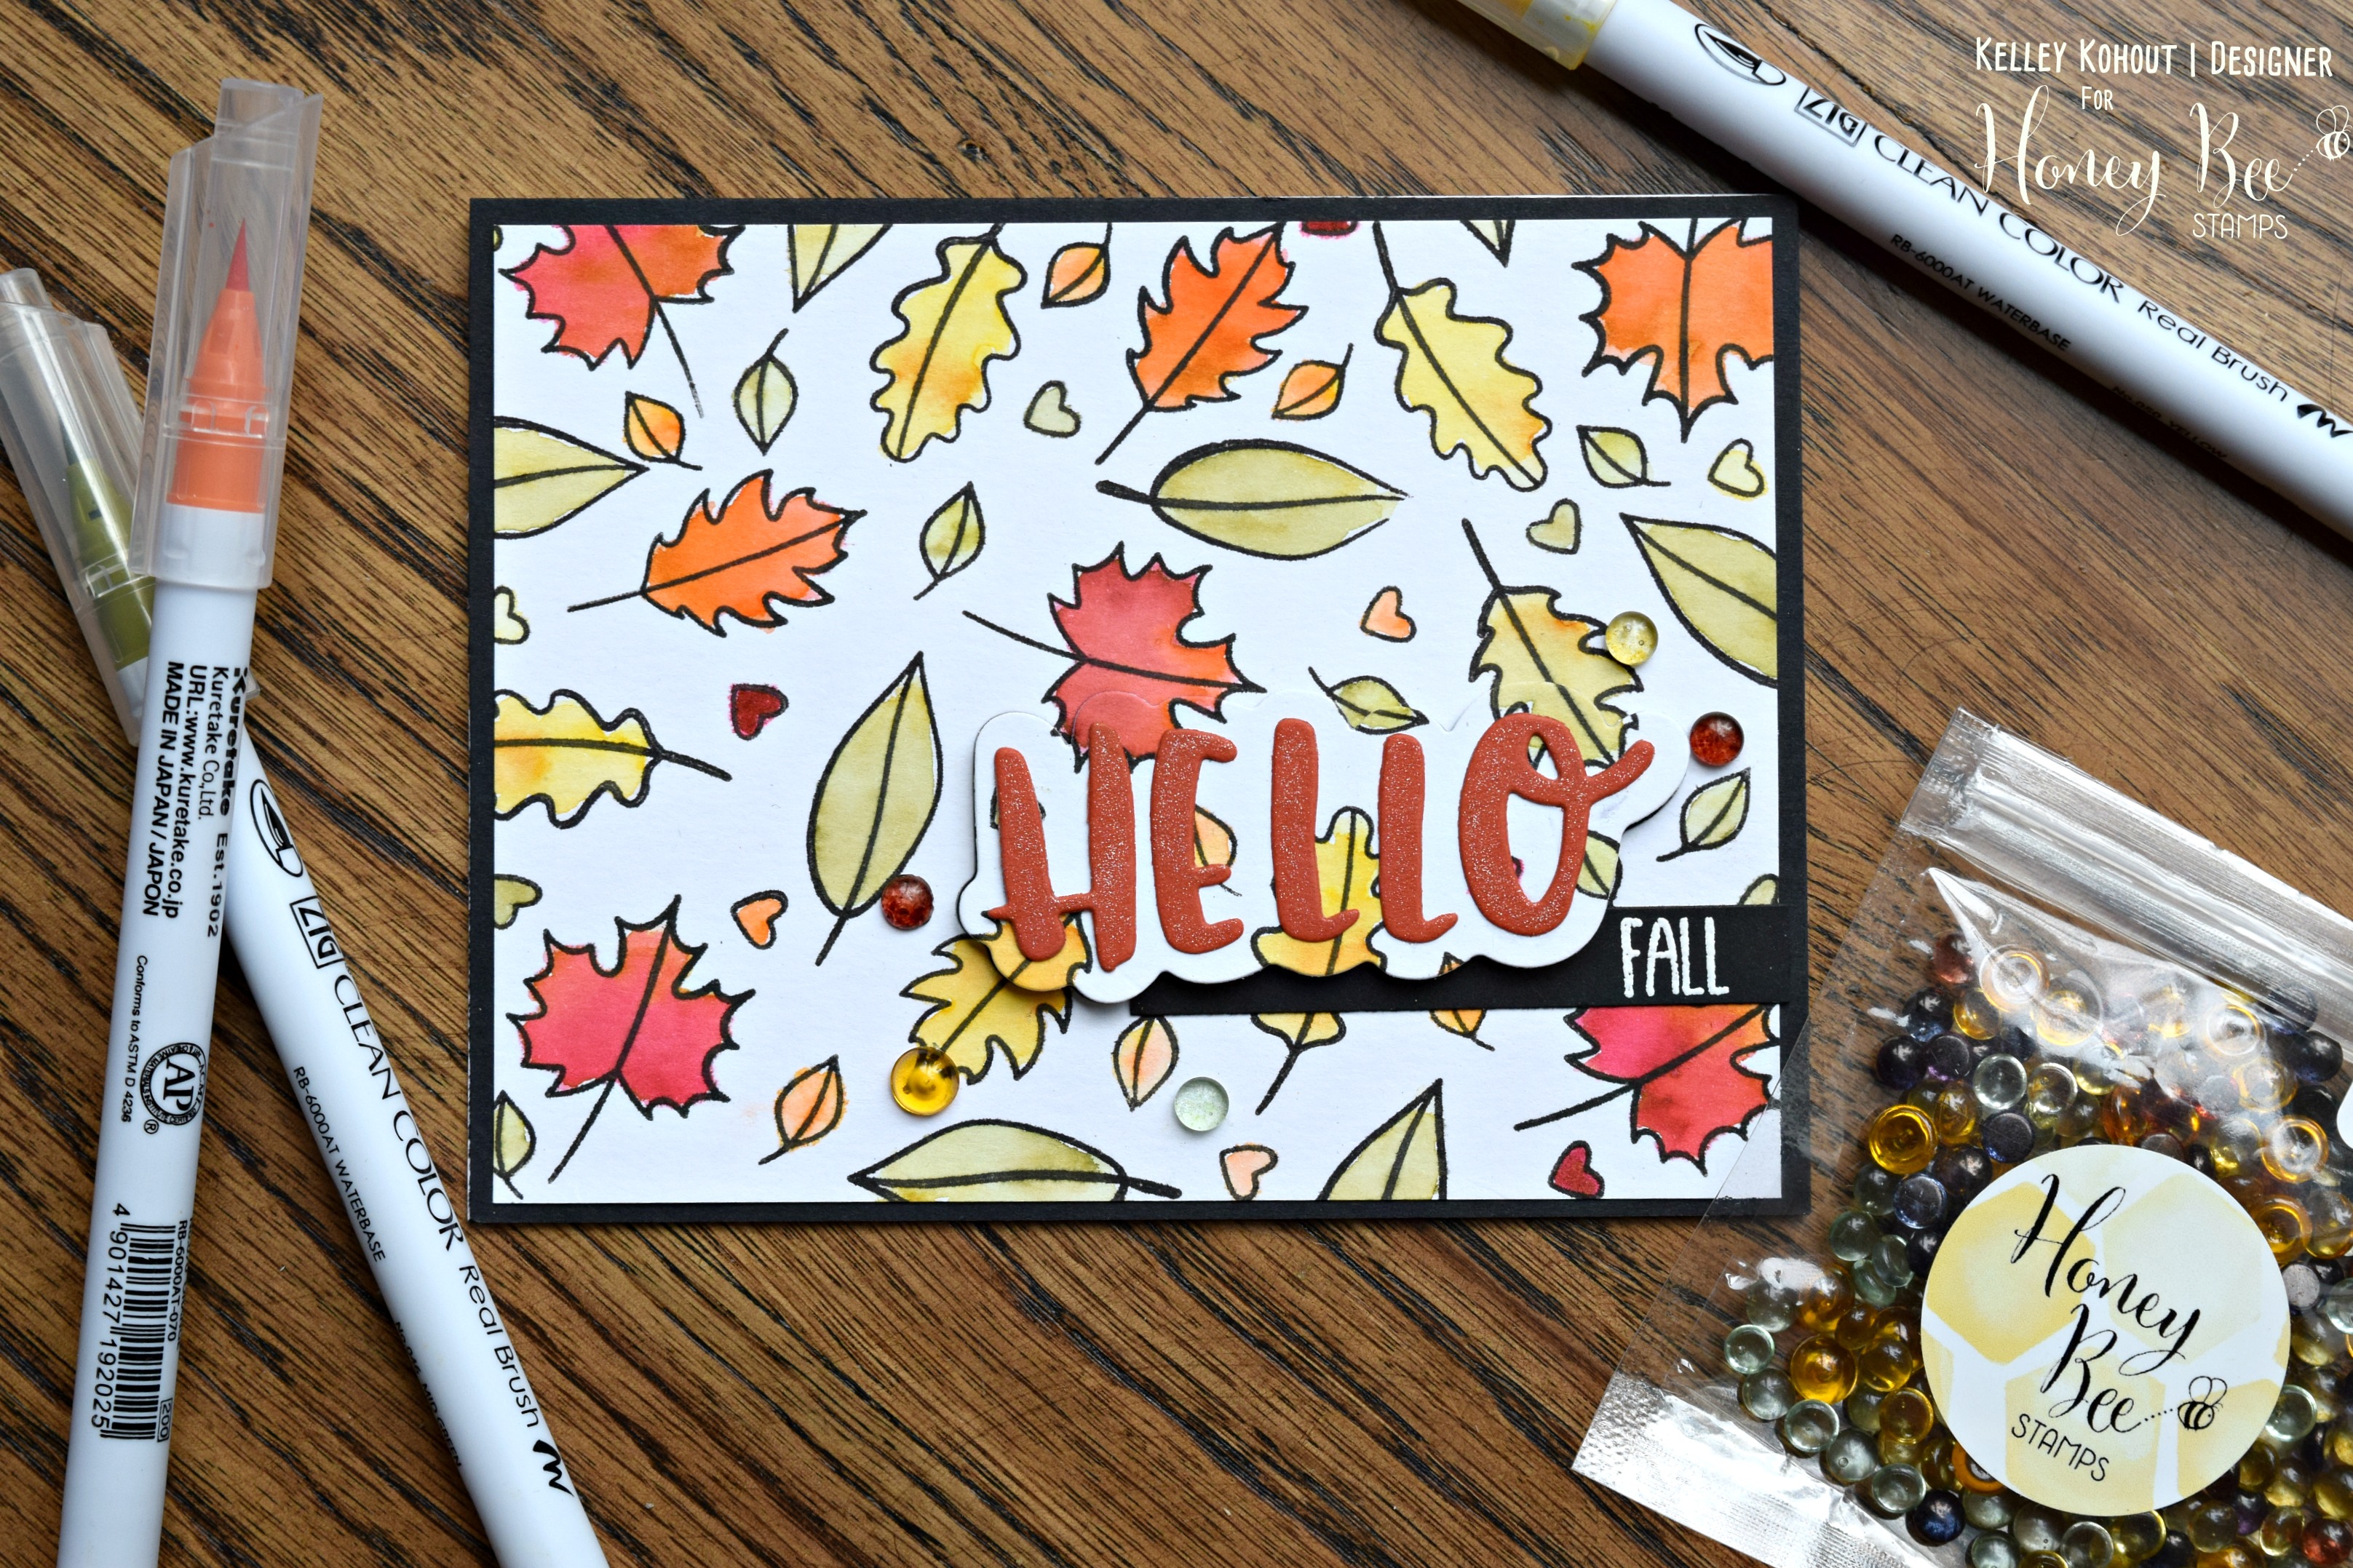
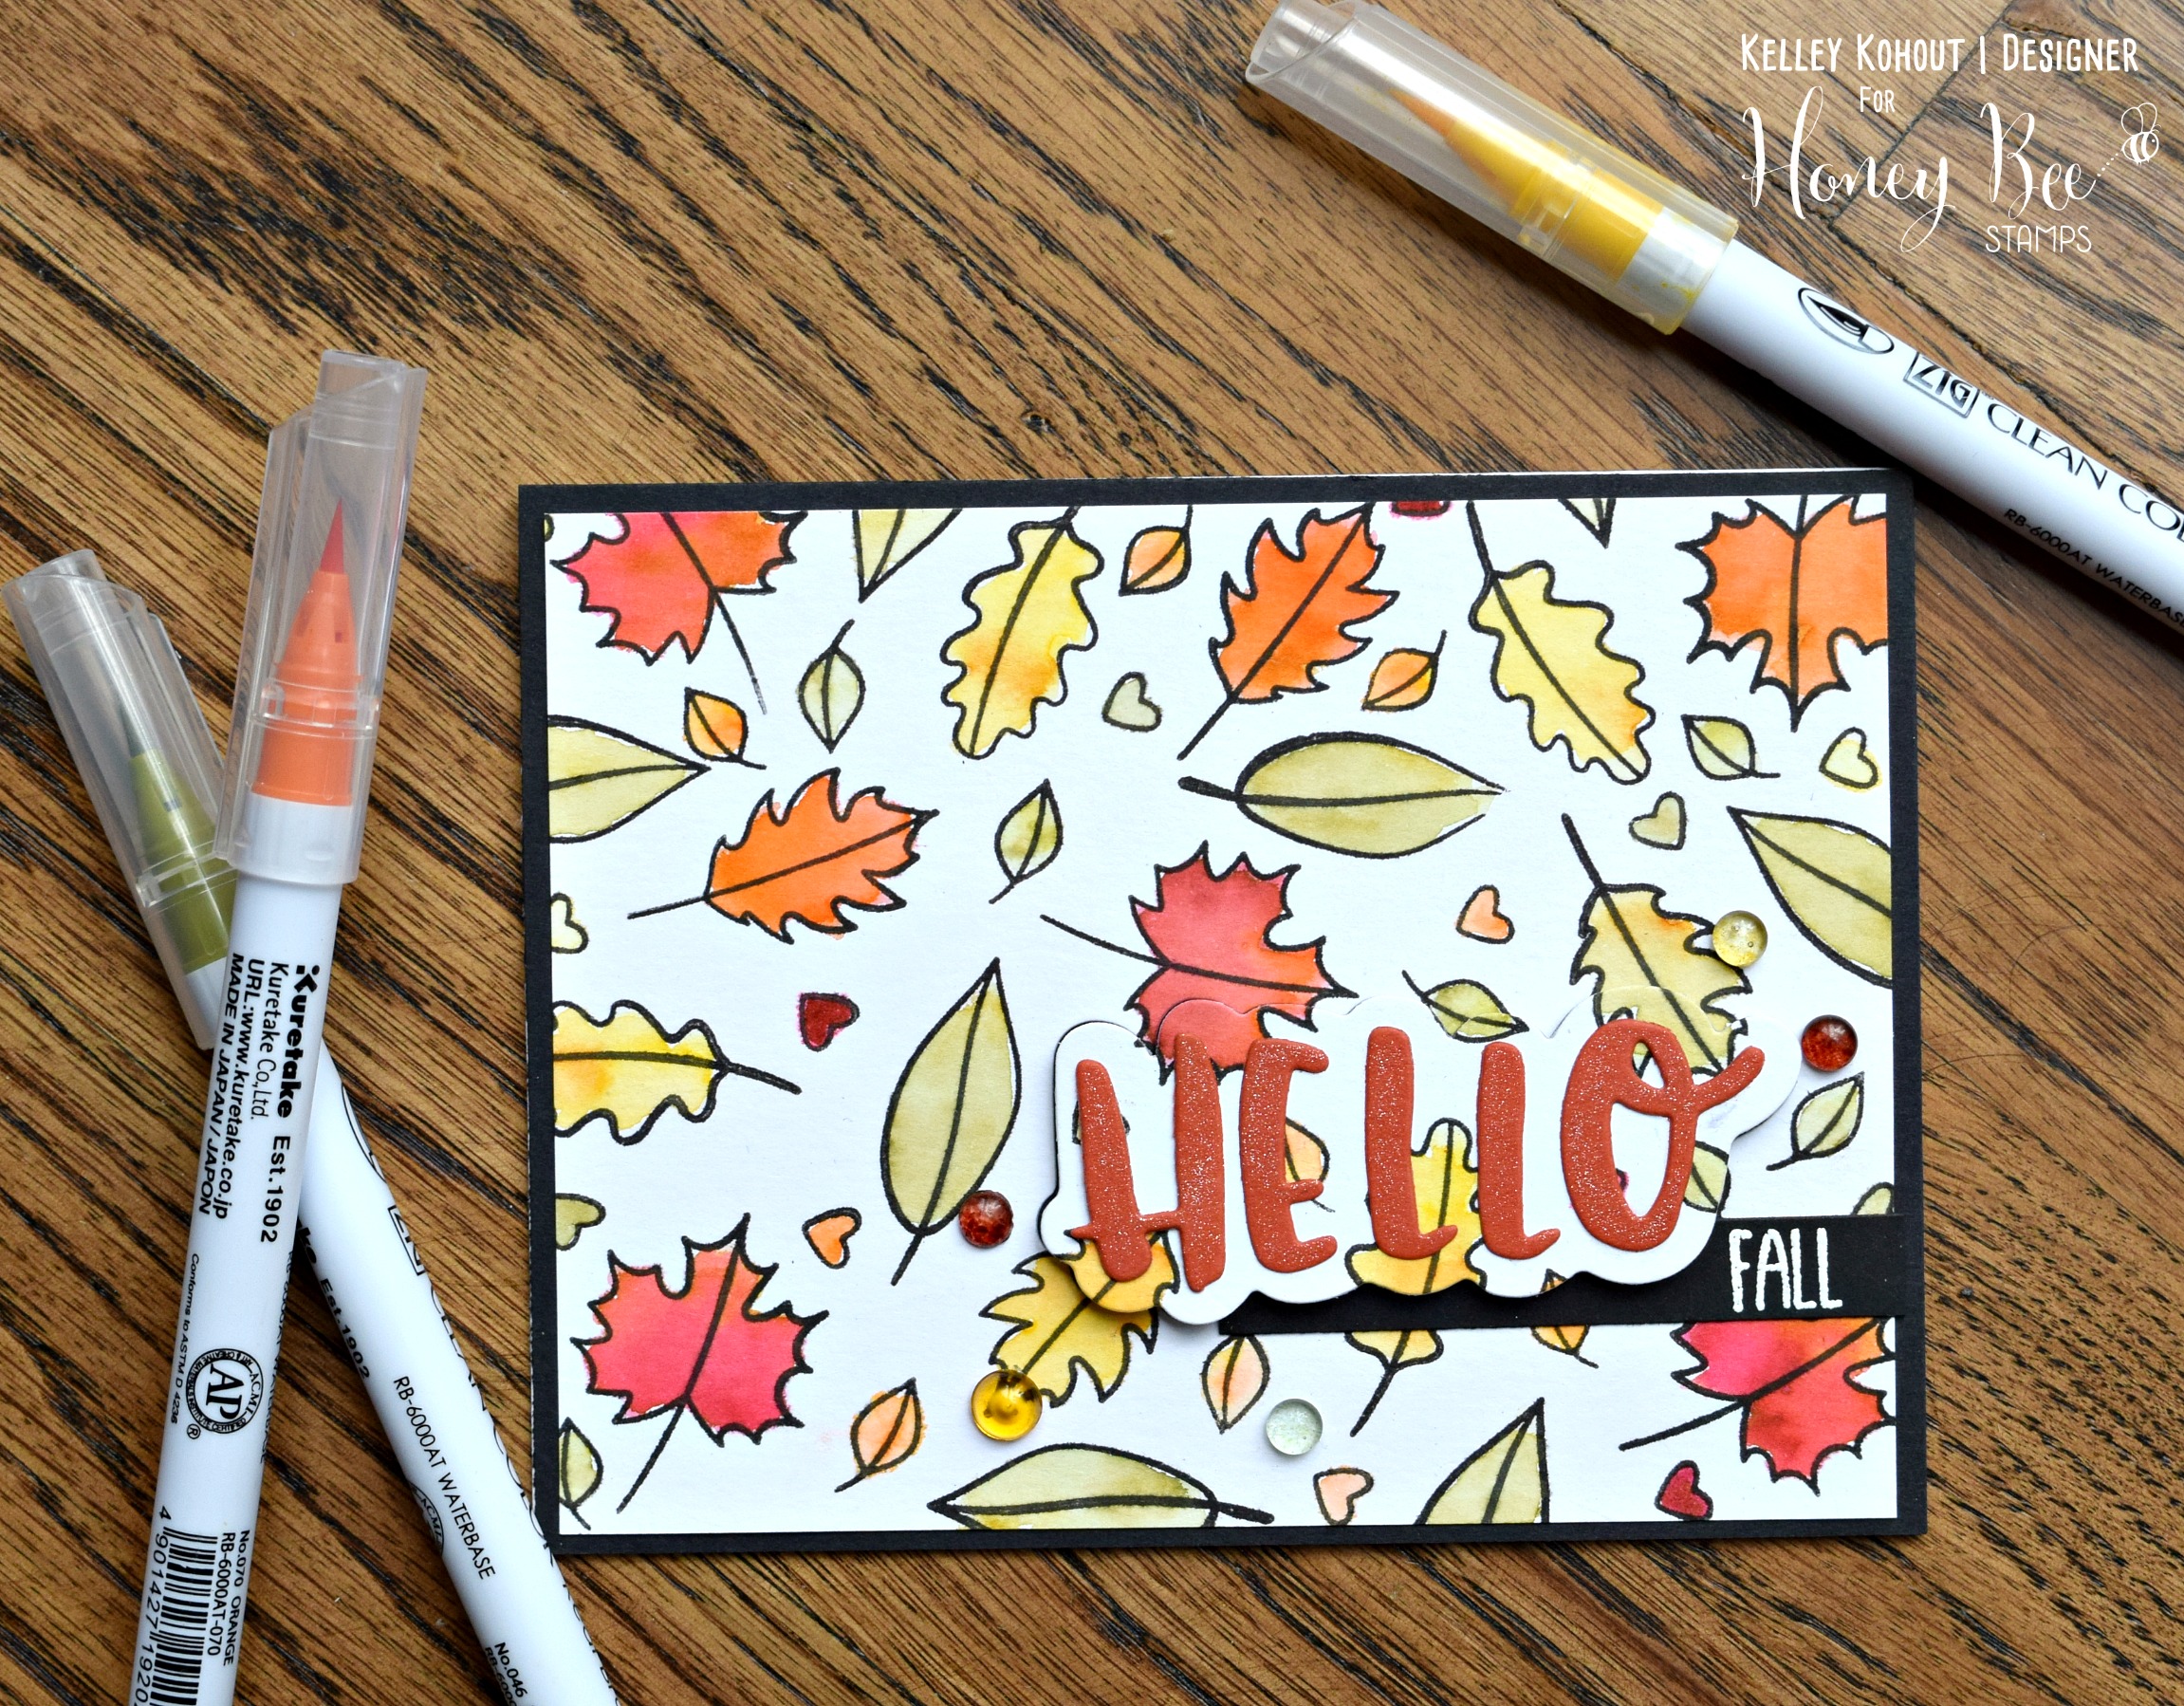
I'm sharing a one layer thank you card today using the super cute Snow Birds Stamp Set!


I have created and attached a video tutorial below! I hope you'll hang out for a little bit and check it out. If you'd rather watch on YouTube, please click here!!


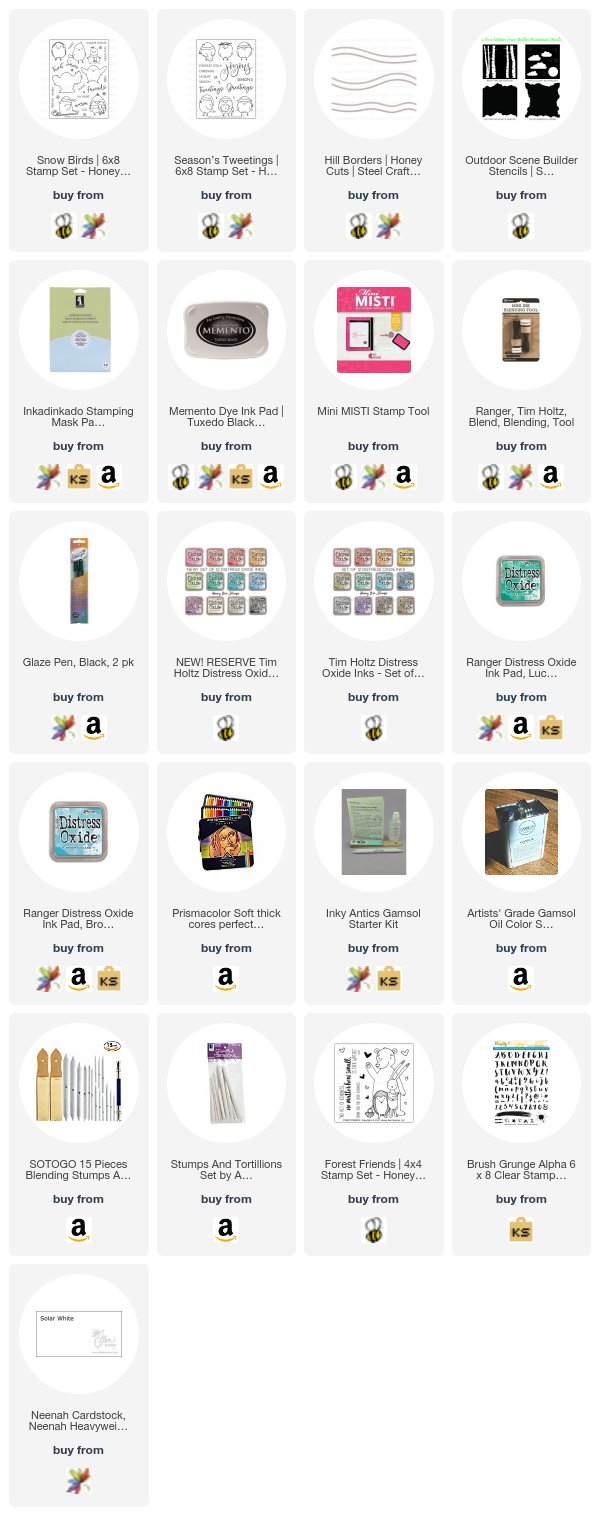
Thank you for watching! All of the supplies used in the video are included in the supply list at the bottom of this post.


After cutting a hill from the Hill Border Dies, I used a negative piece to mask and add the Lucky Clover Distress Oxide Ink. I placed the whole card into my Mini Misti and stamped the little bird in Memento Tuxedo Black Ink. Before cleaning off the stamp, I used the residual ink to stamp onto masking paper. I used fine point scissors to fussy cut the bird and then added the mask over the top of the image on my card.

Included in the Outdoor Scene Builder Stencil Set is the FANTASTIC cloud stencil. I stenciled the clouds in Broken China Distress Oxide Ink. The stencil makes these clouds so easy!


The create the greeting, I used the Grunge Brushed Alpha. Unfortunately, it has been retired from Honey Bee Stamps. If you love it, you can search the web and find a few still left in some of the shops that carry Honey Bee Stamps;)  I did some very basic coloring with Prismacolor Colored Pencils. Blending the wax/color  from the pencils is super easy with the help of Gamsol and paper stumps. My video above shows just how easy using these supplies is.

Thank you for stopping by!!
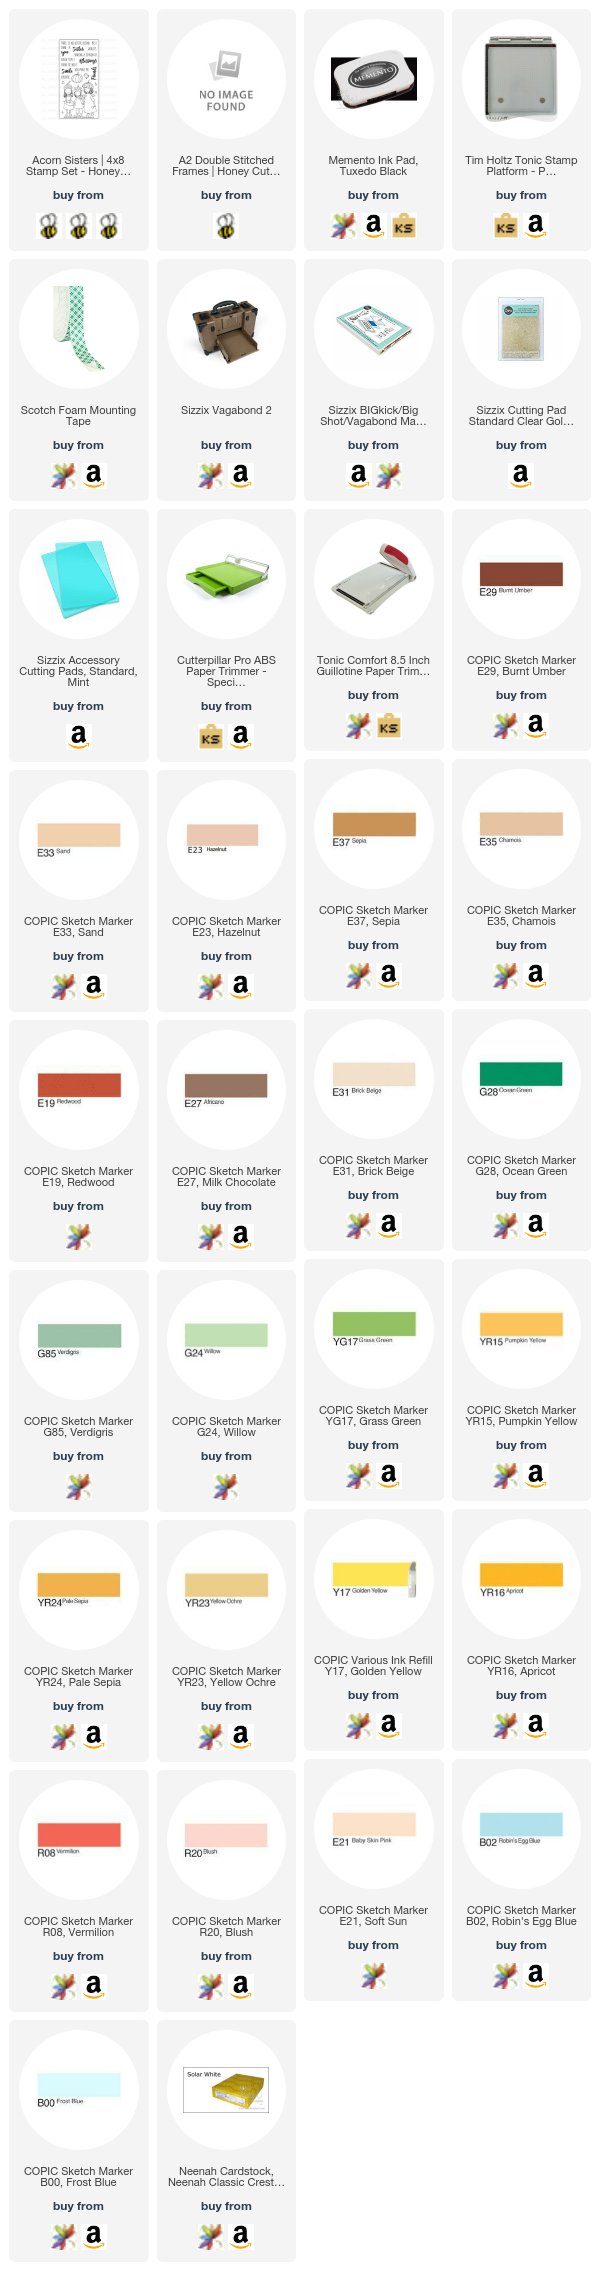
                                          

Supplies:


http://linkdeli.com/widget.js?1513841347072

Tuesday, December 19, 2017

Adore Him!! Winter Scene Card

Merry Christmas!


I was recently inspired by a winter scene created by artist and paper crafter Betsy Veldman. She created the coolest tree scene and I knew I had to recreate it using the Adore Him stamp and adding some Christmas touches.


I've attached a tutorial video below. Making these trees are so very easy! Check it out below or on  my YouTube channel HERE!


*** Fossilized Amber Oxide used not Mustard Seed :)
Thank you for sticking around! All of the supplies used in the video are listed in the supply list found at the bottom of this post!


I started the background my drawing the star with  Molotow Masking Pen. This kept that spot nice and clean so I could add the Starry Colors watercolor later on. Using Broken China Oxide Ink, I blended just toward the top of the paper and around the star, leaving open space to add the Fossilized Amber Oxide. I was super careful not to pull up the masking fluid with my ink blender. I also didn't want to mix the yellow and blue oxides....so I was careful not to get too close when adding the ink. Using the Distress Sprayer, I spritzed water onto the blue background, and soaked up the drips with a paper towel. This adds to the snowy effect! After letting the inks and water dry, I began working on the trees.


I used a cheap fan paint brush and 3 shades of green ink to make the trees. Wetting the brush lightly first, I picked up ink and let the fan brush do all of the work shaping the trees. Check out the video above for lots of details. The snow on the branches is inexpensive white craft paint. I used the same fan brush and added it sparsely to give the look of snow. The Adore Him stamp was so perfect for this project! I inked it in Nuvo Clear Mark Ink and heat embossed it with platinum embossing powder. The background was trimmed and added to coordinating blue card stock and then adhered to a white top folding card base. The beautiful sentiment is all this card needs! No need to add any other embellishments ;)

I want to wish you all a Merry Christmas! Have a blessed day enjoying loved ones!
                                              

Supplies:
http://linkdeli.com/widget.js?1513343203250


Tuesday, November 14, 2017

Merry & Bright Spotlight Greeting: Honey Bee Stamps


Hello everyone!
For today's project, I made this spectacular greeting stamp the highlight of my card! This new stamp is called Merry and Bright and has so many uses. I started by stamping the sentiment in Nuvo Clear Mark Ink and then covering it in Platinum Embossing Powder. Using my heat tool, I made sure the powder was set nice and smooth.


Next, I stamped all of the accessory images from the Blah Humbunny stamp set around the greeting. Most of the little images were colored with Copic Markers. The silver bells were painted with the Starry Colors water color set. This set of paints has beautiful metallics. The bells are painted with White Gold. I used a black glaze pen to add details onto some of the images.


The white puff trim was added to the Santa hats by using a glue pen to cover the desired area and then adding Wow! White Puff Embossing Powder. This stuff is so cool! It gets puffier the more layers you add ;)  The final little touch was adding a few Pirate Black Half Pearls. I love these things! They add the perfect dimension and shine!

Supplies:


http://linkdeli.com/widget.js?1510309329151

Wednesday, November 8, 2017

Season's Tweetings: Honey Bee Stamps Winter Release


Hi Crafty Friends!!
The Honey Bee Stamps Holiday Release is now available in the store. To celebrate the new release, we are having the Season's Tweetings Blog Hop. So please get comfy and hop along with us!


I created this little card by first blending on some Broken China Distress Ink. I started heavier at the top and got lighter as I blended toward the bottom. Next, I added the snowfall by using the Fall Showers (set of 3) Stencils and Snow Tex Paste. The Snow Tex makes a fluffy looking snow and dries quickly. It rinses off of your tools and stencils easily as well!


I stamped and copic colored the adorable bundled up bird from the Snow Birds Stamp Set. Using the coordinating dies, I cut him out and added him to the snowy panel with foam tape.
It's hard to capture in photos, but a bit of wink of stella was added to the bird as well as all of the snow.


The greeting is also from the Snow Birds set. I stamped Snow in Nuvo Clear Mark Ink and added white puffy embossing powder to give it the look of snow. I used the coordinating dies to cut out the Snow word and added it to the rest of the greeting.

Thank you for joining me!


Be sure to visit each blog & leave a comment to be entered to win!!! We will be giving away a $50 gift card to the Honey Bee Stamps store. The winner will be posted on our blog Monday, November 13th.

The Blog Hop lineup is:


Tuesday, October 10, 2017

Partial Die Cutting | Honey Bee Stamps

Welcome back!

Today I'm sharing a partial die cut technique. I never seem to remember this great way to get more use from my dies.


I used the HBS A2 Double Stitched Frames and the Forest Friends stamps and dies to create this "almost" one layer card. Attached below is a video tutorial with all the details on making this card project. I hope you'll stick around and check it out! If you'd rather watch on our YouTube Channel.....click HERE! 

Video:


Thank you all for checking out the video! A detailed list of supplies used in the video can be found at the end of this post.


I stamped the cute little Forest Friends onto Neenah Desert Storm card stock. I used the partial die cut technique, detailed in the video above, to make the stitched window for the critters to stand. The image was colored very simply with Prismacolor Pencils.  I ink blended the background using Distress Oxide Inks. From bottom to top they are: Spiced Marmalade, Wild Honey, and Fossilized Amber. I added Nuvo Drops in Dandelion and Ripened Pumpkin for just a bit of confetti in the corners.

Supplies:


http://linkdeli.com/widget.js?1507549983387

Saturday, October 7, 2017

World Card Making Day | Chibitronics & Honey Bee Stamps Collaboration Project!


Welcome and Happy Card Making Day!!!

I had so much fun playing with the Chibitronics Starter Kit and my Honey Bee Stamps


I started this card by first stamping the snowman and little bird from the Let It Snow Stamp Set. It's stamped on both Bristol Smooth Card Stock for the scene and masking paper. I fussy cut the images on the masking paper and adhered them over the images on the card stock. Using a set of hill dies, I cut the hill from masking paper as well. Once all of the masks were in place I began to blend Distress Oxide Inks to create the background. The first color (just around the snowman's heart) is Fossilized Amber. Next is Antique Linen. Did you know that Antique Linen doesn't turn green when mixed with the blue shades??? Me neither until a super sweet friend told me to try it out! I was able to create the warm glow around my snowman without the greenish tone. Score!!  The next colors radiating out from the snowman are Broken China, Faded Jeans, Wilted Violet and Black Soot. 


After the oxide ink blending, I gently pulled off the masks. I did some super simple Copic coloring of the snowman, bird, and snowy hill. For the falling snow, I used a white gel pen.....soooo easy! I also sprayed a tiny bit of shimmer mist over the project, which is really hard to capture in photos. In "real life" is is super glittery and beautiful. I used a heart die found in the Coffee Break Die Set to die cut the area for the snowman's heart. I colored a small piece of vellum with Copic Markers and die cut it with the same heart. I inlaid the heart and used a small bit of clear tape to hold it into place. 


Now.  this is my first project using the Chibitronics Lights. I was super nervous, but followed the instructions laid out in the manual that comes with the stater set. I practiced a circuit in the little workbook and then set to work building the circuit for my snowman. After putting together my little light, with my switch being the little bird, I built housing for my battery out of foam tape. I used a triple layer of tape going around the battery so it has to be pushed to turn the light on, and then also added foam tape to the other open areas around the circuit. I added my snowman scene to all of the exposed foam tape and pressed my little bird for the snowman's heart to light up. Voila!!! My snowman had a warm and glowing heart! These things are so stinkin' fun!!! 

Thank you so much for stopping by!!! Don't forget about the sale!


Stop by each blog on the hop to have a chance to win 1 of 2 prizes. Honey Bee Stamps will be giving away and $25 gift card and Chibitronics will give a starter kit! Winners will be posted on Monday, October 9th;)


Kelley Kohout -----> You are here!
Kelly Griglione -----> Next Stop!

 Supplies:

Tuesday, October 3, 2017

Witching You | Honey Bee Stamps


Hi there! It's Kelley back again with a Halloween card project.
I had a great time with the masking and ink blending on this card. I have prepared a video tutorial including all the steps taken to create this card. I hope you'll check it below! If you'd rather watch it out our YouTube channel, click Here!

Video Tutorial:


I appreciate you sticking around! A full list of supplies is found at the end of this post.


To start out the scene I prepared masks for the hillside. Using the masks as guides, I set up the large stamp from the Hey Pumpkin stamp set in my Misti. I masked off the areas of the stamp that I did not want to use on the card. I stamped the trees in Versafine Onyx Black Ink and covered them in clear embossing powder. Using a heat tool, I warmed the powder and melted it until nice and smooth. To make the ink blending easy, I used masks to cover each area . I used both Twisted Citron and Peeled Paint Distress Oxides for the ground. For the sunset, I blended on Spiced Marmalade, Picked Raspberry, and Wilted Violet Distress Oxides. Sprinkling the inks with water gives it the spotted oxide reaction.


I colored the Curious Kitty and witches hat with Copic Markers and then fussy cut each image. To get rid of the stark white sides once cut, I used a black Zig Clean Color Real Brush Marker to darken the edges. I used a small bit of foam tape to adhere the cat and it's hat to the scene.


The whole greeting is from the Hey Pumpkin Stamp Set. I stamped both the inside and out in Versafine Onyx Black Ink and heat embossed them with clear embossing powder. The cute little kitten on the inside is from the Curious Kitties set. I had so much fun creating this scene and was so excited when the sweet little witches hat fit on the kitty!

Supplies:


http://linkdeli.com/widget.js?1506605333909

Friday, September 29, 2017

Simon Says Stamp STAMPtember | Honey Bee Stamps Remarkable You!


Hello everyone! 
I'm so excited to be taking part in the Simon Say Stamp STAMPtember celebration with the Honey Bee Stamps team! 


I stamped the little girl and pup from the Seasonal Sweeties Stamp Set with Simon Says Stamp Intense Black Ink onto Neenah Classic Crest Card Stock and 2 coordinating patterned papers. I fussy cut the girls coat, scarf, and both umbrellas with sharp detailed scissors.  I colored the rest of the images with my Copic Markers. The "hello Love" greeting from the Remarkable You stamp set is stamped in Versafine Onyx Black Ink, covered in clear embossing powder, and heat set. I wanted to make the sentiment stand out, so I used the Honey Bee Stamps Solid Hexagon Dies to emboss the shapes into the paper. I added a handful of Pirate Black Half Pearls for the finishing touch!


For the inside of the card, I stamped the "miss you" also found in the Remarkable You Sentiment Set. 

Below I have attached a video tutorial for todays project(s). If you'd rather watch over on YouTube please go HERE!

Video Tutorial:


Supplies:

Below you will find links to the supplies used to create this project(s). Click the icon for the store underneath the thumbnails to start shopping. Where available I use compensated affiliate links at no extra cost to you. Thank you! 

Tuesday, September 26, 2017

Hello Fall!


Happy Fall Friends!


I'm sharing a bright and easy fall card using 2 of the brand new Honey Bee Stamps sets. It was fun and relaxing to sit and color the mix of leaves, taking inspiration from the changing colors outside. I have attached the whole process in making this card below. I hope that you'll stick around and check it out. If you rather watch on the YouTube channel, please click HERE!


Video:


 Thank you for watching! All of the supplies used in this video are listed below the post.


I started by stamping all of the leaves onto Bristol Card Stock with Versafine Black Onyx Ink. This ink is water friendly, so it's perfect to use with Zig Clean Color Real Brush Markers and watercolors. I chose fall colors from my collection of markers and simply brushed a bit of pigment onto the leaves. I loved trying different mixes of the colors to get a beautiful autumn blend.


After adding the pigment, I dipped my paintbrush into water and very simply spread the color around. Using a heat tool, I made sure all of the images were nice and dry.


For the greeting, I used the shadow die found in the Gather Together Honey Cuts Die Set and cut it from the leaf painted background. I used coordinating card stock and cut the Hello letters, found in the same die set. I popped the whole Hello greeting up with foam tape. I stamped and heat embossed the word Fall (also in the Gather Together stamp set) onto black card stock. I simply added a bit of adhesive and slide it under the raised Hello. The River Agate Dew Drops were added with just a small dab of liquid adhesive.

Supplies:


http://linkdeli.com/widget.js?1506328142896


Friday, September 22, 2017

Happy Fall Y'all Honey Bee Stamps Blog Hop!


Hi Crafty Friends!!
The Honey Bee Stamps Fall Release has been happening all week, the fantastic fall products are now available in the shop. To celebrate the new release, we are having the Happy Fall Y'all Blog Hop. So grab your cup of Pumpkin Spice Latte, or whatever cozy drink you love and hop along with us to get you in the fall frame of mind!
Be sure to visit each blog & leave a comment, you don't want to miss out on any of the fun prizes!!! We will be giving away TWO $50 gift cards to the Honey Bee Stamps store.
Winners will be posted on our blog Monday, September 25th.


I had so much fun coloring these sweet little Acorn Sisters in their field of sunflowers. I have created and attached a process video below! I hope you'll check it out! If you'd like to watch on YouTube, you can check it out HERE!

Video:


Thank you so much for watching! A full list of products used is provided in the supply list at the end of this post. 


Here's a little peek at the inside of the card! 


Thank you for joining me! Have fun continuing on this Fall Hop! 


Supplies: